Showing posts with label painting. Show all posts

Tuesday, 28 September 2021

Beware the Ide(a)s of the Home Improvement Project!

It has been quite a while since I have blogged. This is mostly because I have not had access to my account. My old computer died and I no longer had access to the old phone number I had used as back up verification. Google has an annoying security measure that won't let you log in from a new device without back up verification (and no I couldn't answer any of the personal questions correctly - I guess I'm not who they think I am!) I have had to go through a bunch of silly hoops, like blindly calling the old phone number and asking the person who has it to send me a verification code: Talk about an Identity crisis! It is a really weird feeling trying to call someone you don't know so "they" can identify you to an organization that doesn't know you either! Luckily I can impersonate myself well enough to regain my virtual identity!

Anyway, whoever I am, I'm back!

I thought I would start off with an introductory blog on my so-called fiber room. Covid has given me time to think about self-improvement and so I have set about considering what I can do to improve. It has taken me two years of covid to get to the point of actually taking any action on this, but after lots of hard thinking (and 100s of episodes of Perry Mason and Crossing Jordan) I decided to improve my creative space, so I am taking the corner room of the house to make it a place to write and do art and crafts. 

Unfortunately I started impetuously without taking any real before pictures, so I can't show the couch piled high with stuff and the desk facing the window that was obscured by art supplies and things to be scanned. I had already torn everything apart and removed the couch before I even thought of taking pictures. The first thing I wanted to do was paint. I thought that would make everything look fresh and clean and be the perfect setting for my new start. So I pulled all the crap out into the middle of the room so I could get to the walls.  I figured I would paint one wall at a time, maybe over the course of a couple of days and then have everything organized in a week or so.

Here is the result of pulling out all the stuff.

As you can see there is far too much stuff in this room and alas it hasn't gotten any better as I have worked on it.

As I moved stuff away from the walls and removed the couch etc. I discovered all kinds of hidden issues. This was on July 21. There were big stains all over the carpet and the furniture had been hiding all kinds of problems with the walls.  Each step I took meant stopping my project to fix something that I hadn't planned on. 

First I decided to shampoo the rug spots. naturally I ran out of rug shampoo and had to order more resulting in at least a weeks delay for that part of the project.  Then there was the issue of the baseboard heating system that had been torn out when we decided to switch to geothermal heating. There were gouges and holes in the wall and floor where pipes had been and even burns. And of course there was no molding where the baseboard heating units had been all along the wall. While waiting for the rug shampoo I decided to fill holes and get the walls prepared for painting. Here is one part of the wall in the southeast corner of the room. 


You can see I had already started the sparkling process, which took several passes because of the depth and number of holes and gouges. As you can also see, I decided to paint the parts I could so that my project would not be delayed for such a long time. (Note that now it was already more than a month later : Aug 30th). Look at the huge improvement in the order and organization in my fiber room! ;-(


So much for a two week project! Here you can seethe missing baseboards and more of the problems.  I speckled and sanded and put on multiple coats of paint to cover the black burns (and then repainted the whole wall, because there first coat didn't seem even) and shampooed the rug when the new cleaner arrived, but the didn't solve the problem of the baseboards.

Wouldn't you know that this prefab house from the 70s used nonstandard baseboard sizes! I looked everywhere for baseboard wood that was 2" by 1/2" only to be told repeatedly that they do not make that size. Of course I could special order cut it, but I had no intention of paying 30$ for an 8' piece of wood.  Add t this the problem that the trim going up the corner was yet another size also pretty impossible to find.

I ended up buying 2" by 1/4 inch board, but of course it didn't come in the shiny green color of my already existing baseboard. No problem I thought, just run to the hardware store and buy some glossy green stain. Of course it was not that easy! First they didn't have a glossy stain. I was told I would need to buy a stain and then polyurethane over it. Okay, so I GUESSED about the green color. (Yes, I know that color memory is one of our least accurate human abilities - I am an artist I knew better, but I was fed up by this time and in a hurry.) So of course I did not get a close color and I probably should not have gotten semi translucent stain, since it didn't go on very dark, BUT..... since it was an oil based paint and I do oil painting, I took some of my precious oil paints and palette mixed an olive green color for the  make-shift baseboard. It wasn't perfect, but by this time I felt that half-assed would do.


Here is a comparison of my new board (below) with one of the pieces of trim I needed to match. Not dark enough, but too bad!) The trim, by the way is the part that goes vertically up the corner of the room.

Now I had the problem, that the trim and the baseboard on the east wall were 1/2 inch thick and the new board was only 1/4 inch thick. I also had a 6 inch gap in the vertical trim that I would have to fake somehow. I dug around in my garaged, stained another piece of random wood for the vertical trim and (more oil paint and palette mixing - two more days of drying and then another day or so for polyurethane and I was ready to do this jigsaw puzzle of a molding problem.

When I put it all together it looked terrible, because the vertical trim stuck out 1/4 inch farther than the horizontal trim along the south wall. So I got out my sandpaper and started narrowing the trim long the last inch of the trim (Making it more like 3/8 inch in thickness. Then I crow barred the thin trim away from the wall just a little bit so that there was a tromp l'œil  effect to make the boards look like they were the same width. (I swore I wasn't going to do anything half-assed, because I had inherited so much of a fish-mosh in this room, but by this time I was desperate to be done.)

Here is what I ended up with. This is before:


And this is after:


Okay, so it isn't terrible and besides there is furniture in front of it anyway.

Now comes the hard part, organizing and reducing the amount of stuff.   So it is October now and I'm still working on that part. I'll have to do an update as soon as I can get that last part done! (Of course I haven't even mentioned the traverse rods and curtains and what an ordeal it was removing and replacing them, but it is time to close this blog entry so that will remain a mystery.). 

So as embarrassing as the mess is, here is where it currently stands. The walls are painted, but the mess is still a mess. Why doesn't that surprise me?


Saturday, 14 September 2013

Art on Display

It is opening day for the art exhibit at our co-op - so here is the display.


Unfortunately the overview shot is out of focus, but it still gives a sense of the exhibit.


The works are by my mom and myself and we were fortunate to be given the central part of the wall where we will be more visible.


More words later - we are off to the Renaissance fest!


And this is an update on the vest!

Friday, 6 April 2012

Winter Painting update

Lynn's updated painting:

Monday, 2 April 2012

Other Art in the House

Here is what my Mom has been working on while I've been drawing. The painting isn't finished, but it is looking so good, that I just have to post a picture of the unfinished piece.

Thursday, 15 July 2010

State of the Painting


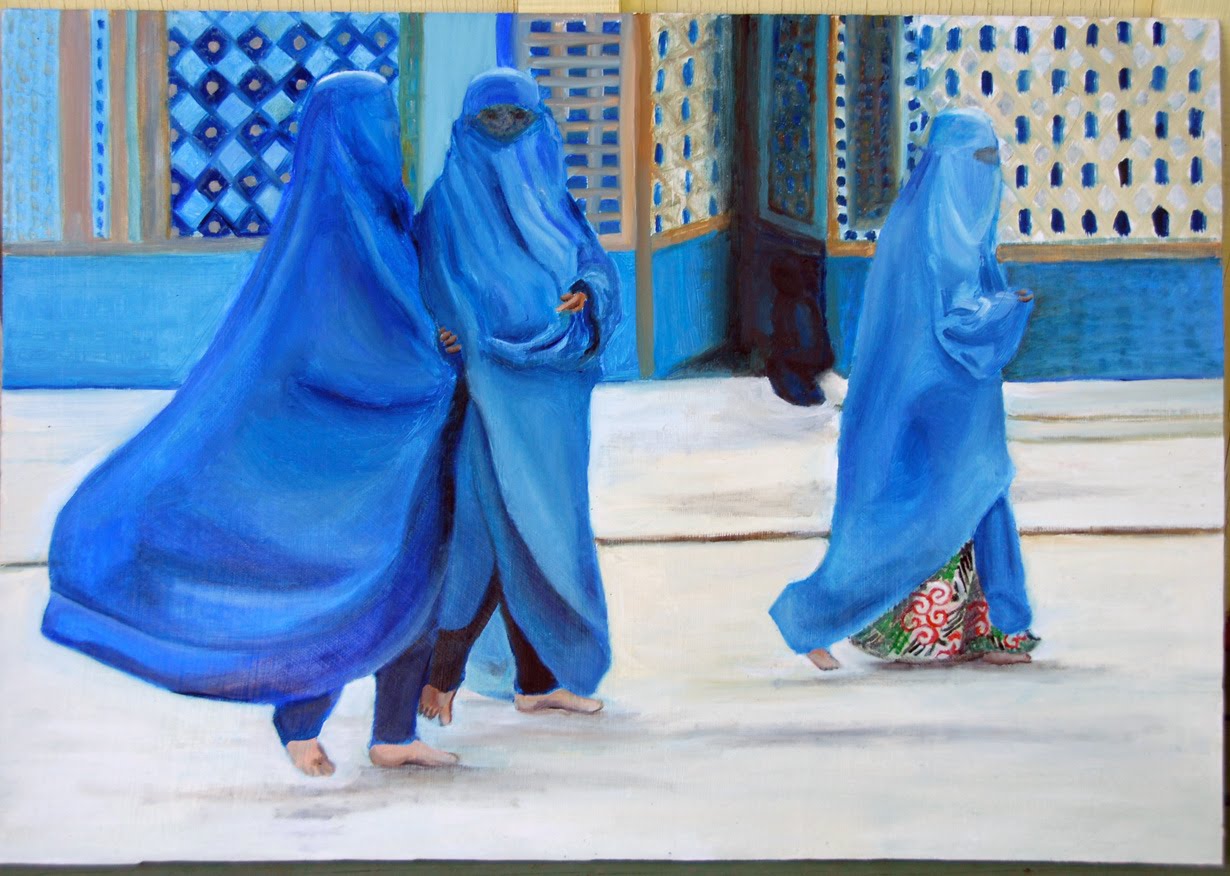
Changes in the most recent Afghan painting:


This was the last version:

Friday, 9 July 2010

Wednesday, 7 July 2010

Some Minor Adjustments

Today I cleaned up some of my old paintings. I'm going to take them by a local coffee shop tomorrow and see if they might be interested in hanging them on the walls. I've been framing, but unfortunately I bought the wrong sized framing material, so I can't frame as many as I had hoped. Here are the new versions juxtaposed to the old versions.  Mostly I was cleaning up lines, so the changes might not be too obvious.


Maybe I like the old version of this a bit better! This is the new version of the dead man. I hated the figure on the left - he looked so mechanical and toyish although in my photo he was very military and precise (which is a similar appearance.)


I like the changes in this one the most. It looks smoother and just a lot more childlike (I rounded the child's cheeks and enlarged the head to make the child more toddlerlike. I want to tone down the black along the back area still.


I smoothed out some minor flaws in this one. Made the bandana more nuanced and changed the child's lips.


Here are the two new ones. I have finished the Walking Women, I think. Unfortunately I forgot to take a picture in natural light, so the color is way off on this image. I'll take a new one tomorrow.


Here is the progress on the newest one. I'm still laying in the ground, so it won't look like anything for a while.


Tuesday, 6 July 2010

Work on Painting and More Garden

Today was productive. I managed to get some writing done and even had time to paint. Here is the progress on the second in the series of Afghani women.


I also finally got around to filling in the pattern of the skirt. I still need to do some shading so that it is more than a flat area, but I need it to dry a bit first. I'm still trying to decide whether it makes the painting too busy or creates the effect I want.


I'm also trying to frame the old series. Man I am a lousy framer. I guess professional  framers don't use popsicle sticks, so maybe that's my mistake:


Here are some of the finished frames around their paintings. Of the nine in the series I have about 5 done and another 3 miscellaneous paintings in the process of being framed.


The garden just keeps getting more colorful. 


Here are some shots of the red and white garden to show that there actually is a preponderance of red and white in it (despite the orange and blue flowers that seem to pop up from time to time.)


The day lilies on the west side of the drive are just starting to bloom. Soon it will be a wall of color, but for now it is subtle and a bit cloying.


Wednesday, 16 June 2010

Current Projects

Went to the local coffee shop to see work by Sandy Bot Miller and was inspired. She did a whole series of wise women knitters, that was vibrant and enthusiastic. I decided I would do additional pieces for my Afghanistan series. This is what I have been working on recently. I want to do a series on the plight of women in Afghanistan to match the peace to war series.


Here is what I started with some of my yarn from China - I'm not very far with it yet.